Posts

Bridal Blurbs: Nifty Apps You and Your Fiancé(e) Can Use While Planning Your Wedding

[cs_content][cs_section parallax=”false” style=”margin: 0px;padding: 45px 0px;”][cs_row inner_container=”true” marginless_columns=”false” style=”margin: 0px auto;padding: 0px;”][cs_column fade=”false” fade_animation=”in” fade_animation_offset=”45px” fade_duration=”750″ type=”1/1″ style=”padding: 0px;”][cs_text]Note from Mimma Benz: Am happy to have on board as our columnist, Kassy Pineda. She’s a Wawie who will write about her adventures and experiences as bride. Her first article is lifted from her Tumblr Account talking about how to survive in this digital age of planning. Please welcome Kassy to the WaW Fam![/cs_text][/cs_column][/cs_row][/cs_section][cs_section parallax=”false” style=”margin: 0px;padding: 45px 0px;”][cs_row inner_container=”true” marginless_columns=”false” style=”margin: 0px auto;padding: 0px;”][cs_column fade=”false” fade_animation=”in” fade_animation_offset=”45px” fade_duration=”750″ type=”1/1″ style=”padding: 0px;”][cs_text]Here’s the scenario: You (or your fiancé[e]) own(s) a desktop or a laptop, or if you two are of the techy kind, you own a tablet. Because seventeen or more years in school and/or work requires you to be equipped with basic knowledge of tinkering around MS Word, Excel, and Powerpoint, you use these applications to help plan your wedding.

But, alas! Your twelve-year-old laptop crashes…on the ground. Your desktop tower suddenly refuses to cooperate because of that motherboarding motherboard. Or your tablet gets stolen. Did you keep all your updated files in a USB or did you back it up on a hard drive? No? Darn.

Okay. Something similar happened to me a few days back. You see, I’ve been using my work laptop for my personal use (sorry, boss!) since I turned over my six-year-old Macbook Pro to its new owner, my colleague’s teenage daughter. I was supposed to do some work at home during this week’s city holiday when my laptop’s screen decided to conk out on me. I NEED TO WORK! I NEED MY FILES! OUR CUSTOMERS NEED ME! I NEED TO UPLOAD ADVISORIES ON OUR SOCIAL MEDIA ACCOUNTS!!!

The next day, I sent my laptop to our IT guys and they revealed that my laptop screen and keyboard are not functioning, but my files are still intact, so they backed up all my work files as I wait for a proper diagnosis from the technicians.

You ask now, why am I not worried about our wedding preps files? You get your answers below:[/cs_text][/cs_column][/cs_row][/cs_section][cs_section parallax=”false” style=”margin: 0px;padding: 45px 0px;”][cs_row inner_container=”true” marginless_columns=”false” style=”margin: 0px auto;padding: 0px;”][cs_column fade=”false” fade_animation=”in” fade_animation_offset=”45px” fade_duration=”750″ type=”1/1″ style=”padding: 0px;”][x_image type=”none” src=”http://weddingsatwork.com/wp-content/uploads/2016/08/WeddingApps1.jpg” alt=”” link=”false” href=”#” title=”” target=”” info=”none” info_place=”top” info_trigger=”hover” info_content=””][/cs_column][/cs_row][/cs_section][cs_section parallax=”false” style=”margin: 0px;padding: 45px 0px;”][cs_row inner_container=”true” marginless_columns=”false” style=”margin: 0px auto;padding: 0px;”][cs_column fade=”false” fade_animation=”in” fade_animation_offset=”45px” fade_duration=”750″ type=”1/1″ style=”padding: 0px;”][cs_text]Dropbox.

Back when I was working in a Digital Media agency, I used to share files with my colleagues on the fly. I was a Manila-based writer doing Social Media content planning for Singaporean companies, and most of my officemates are in the Little Red Dot, so we found it efficient to exchange files through Dropbox. Now that we are planning our wedding, the fiancé and I keep our files in a shared Dropbox folder where we consolidate supplier quotations, guest lists, pegs, and other files. I have now migrated my Dropbox files to my dad’s laptop while I wait for IT to fix my laptop, and I can also access my files using my iPhone! Pro tip: Increase the capacity of your Dropbox by referring friends to join Dropbox, tweet about it, or connect several computers to your Dropbox.

Evernote.

If you are less effective in jotting down notes using pen and paper, it’s faster to type it in! Like Dropbox, you can sync your notes from suppliers’ meetings, do a checklist, and even write your vows! You may also access Evernote on your laptop, tablet, or smartphone.

Google Docs and Google Drive.

This is an alternative to Dropbox, since you can edit your guest list using Google Docs on your web browser simultaneously with your fiancé(e). Also, you can keep your files in Google Drive. Personally, I find Dropbox easier to use than Google Drive, but I like Google Docs especially when you and your fiancé(e) are discussing guest lists on Skype (hello, LDR couples!), Facebook, or Facetime.[/cs_text][/cs_column][/cs_row][/cs_section][cs_section parallax=”false” style=”margin: 0px;padding: 45px 0px;”][cs_row inner_container=”true” marginless_columns=”false” style=”margin: 0px auto;padding: 0px;”][cs_column fade=”false” fade_animation=”in” fade_animation_offset=”45px” fade_duration=”750″ type=”1/1″ style=”padding: 0px;”][x_image type=”none” src=”http://weddingsatwork.com/wp-content/uploads/2016/08/WeddingApps2.jpg” alt=”” link=”false” href=”#” title=”” target=”” info=”none” info_place=”top” info_trigger=”hover” info_content=””][/cs_column][/cs_row][/cs_section][cs_section parallax=”false” style=”margin: 0px;padding: 45px 0px;”][cs_row inner_container=”true” marginless_columns=”false” style=”margin: 0px auto;padding: 0px;”][cs_column fade=”false” fade_animation=”in” fade_animation_offset=”45px” fade_duration=”750″ type=”1/1″ style=”padding: 0px;”][cs_text]Viber/Facetime/Line/WhatsApp/whatever.

If you have a mobile data plan, or if you carry a pocket wi-fi with you all the time, you may want to use this to call your fiancé(e) in the middle of a meeting with a supplier, or in the middle of a meltdown because of a supplier or somebody else (maybe you? Loljks!). Phone bills are no joke, and your existing data plan may just save your bank accounts from its possible demise. But what if you do not have a data plan?

Sign up for unlimited call and/or text promos.

Call your service provider and know your options. Calling your suppliers, fiancé(e), entourage, or family every so often during your preps may cause your communication expense to skyrocket. Some mobile service providers offer boosters for this purpose, and it’s better to pay a minimal amount instead of experiencing a shock of your lifetime when you see your bill!

Facebook/Messenger.

Some suppliers respond faster on Facebook, plus you get to see their sample works before you even send them a message. Also, you get to gauge your suppliers on how they have a relationship with their (potential) clients through their responses made in their Facebook page.

My favourites? Evernote, Dropbox, iMessage, Viber, and Facebook. What are yours?[/cs_text][/cs_column][/cs_row][/cs_section][cs_section parallax=”false” style=”margin: 0px;padding: 45px 0px;”][cs_row inner_container=”true” marginless_columns=”false” style=”margin: 0px auto;padding: 0px;”][cs_column fade=”false” fade_animation=”in” fade_animation_offset=”45px” fade_duration=”750″ type=”1/1″ style=”padding: 0px;”][cs_block_grid type=”two-up”][cs_block_grid_item title=”Block Grid Item 1″]Kassy Pineda[/cs_block_grid_item][cs_block_grid_item title=”Block Grid Item 2″]

About Kassy Pineda:

When not engrossed with her day job as a Digital Media Manager for a utilities company, Kassy muses about her thoughts on wedding preparations and her future married life with her fiance.

[/cs_block_grid_item][/cs_block_grid][/cs_column][/cs_row][/cs_section][/cs_content]

Aisle Do: Kid’s Activity Pack

[cs_content][cs_section parallax=”false” style=”margin: 0px;padding: 45px 0px;”][cs_row inner_container=”true” marginless_columns=”false” style=”margin: 0px auto;padding: 0px;”][cs_column fade=”false” fade_animation=”in” fade_animation_offset=”45px” fade_duration=”750″ type=”1/1″ style=”padding: 0px;”][cs_text]In this column, Ernest Pascual of Bespoke Manila talks about how to DIY your kids activity pack. With the help of Adrian Ardiente for photos, Ernest shows you how to add these personalized touches for your wedding.[/cs_text][/cs_column][/cs_row][/cs_section][cs_section parallax=”false” style=”margin: 0px;padding: 45px 0px;”][cs_row inner_container=”true” marginless_columns=”false” style=”margin: 0px auto;padding: 0px;”][cs_column fade=”false” fade_animation=”in” fade_animation_offset=”45px” fade_duration=”750″ type=”1/1″ style=”padding: 0px;”][cs_text]Kids are adorable especially during weddings. They bring joy every time you see them walking down the aisle. Expect the children to do the unexpected—from walking fast, falling down on their knees, or worst, not walking at all. Come reception time, they need to do something enjoyable. A foolproof scheme can come in the form of an activity pack to keep them preoccupied especially when the program starts.[/cs_text][/cs_column][/cs_row][/cs_section][cs_section parallax=”false” style=”margin: 0px;padding: 45px 0px;”][cs_row inner_container=”true” marginless_columns=”false” style=”margin: 0px auto;padding: 0px;”][cs_column fade=”false” fade_animation=”in” fade_animation_offset=”45px” fade_duration=”750″ type=”1/1″ style=”padding: 0px;”][x_image type=”none” src=”http://weddingsatwork.com/wp-content/uploads/2016/06/AisleDo_KidsGift1.jpg” alt=”” link=”false” href=”#” title=”” target=”” info=”none” info_place=”top” info_trigger=”hover” info_content=””][/cs_column][/cs_row][/cs_section][cs_section parallax=”false” style=”margin: 0px;padding: 45px 0px;”][cs_row inner_container=”true” marginless_columns=”false” style=”margin: 0px auto;padding: 0px;”][cs_column fade=”false” fade_animation=”in” fade_animation_offset=”45px” fade_duration=”750″ type=”1/1″ style=”padding: 0px;”][cs_text]Here’s what you need:

  • Brown paper bag
  • Paper doily
  • Papier mâché letters
  • Glue stick
  • Glue gun
  • A pair of scissors
  • Washi tapes
  • White paint
  • Ribbons

Here’s how to do it.

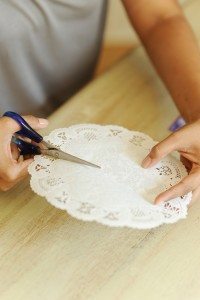
Step 1:   Cut the doily in half, put glue, and and stick it on one side of the paper bag.[/cs_text][/cs_column][/cs_row][/cs_section][cs_section parallax=”false” style=”margin: 0px;padding: 45px 0px;”][cs_row inner_container=”true” marginless_columns=”false” style=”margin: 0px auto;padding: 0px;”][cs_column fade=”false” fade_animation=”in” fade_animation_offset=”45px” fade_duration=”750″ type=”1/1″ style=”padding: 0px;”][cs_block_grid type=”two-up”][cs_block_grid_item title=”Block Grid Item 1″]AisleDo_KidsGift2[/cs_block_grid_item][cs_block_grid_item title=”Block Grid Item 2″]AisleDo_KidsGift3[/cs_block_grid_item][/cs_block_grid][/cs_column][/cs_row][/cs_section][cs_section parallax=”false” style=”margin: 0px;padding: 45px 0px;”][cs_row inner_container=”true” marginless_columns=”false” style=”margin: 0px auto;padding: 0px;”][cs_column fade=”false” fade_animation=”in” fade_animation_offset=”45px” fade_duration=”750″ type=”1/1″ style=”padding: 0px;”][cs_text]Step 2:   Paint the papier mâché letters in white to make it easier for the kids to decorate them.

 [/cs_text][/cs_column][/cs_row][/cs_section][cs_section parallax=”false” style=”margin: 0px;padding: 45px 0px;”][cs_row inner_container=”true” marginless_columns=”false” style=”margin: 0px auto;padding: 0px;”][cs_column fade=”false” fade_animation=”in” fade_animation_offset=”45px” fade_duration=”750″ type=”1/1″ style=”padding: 0px;”][cs_block_grid type=”two-up”][cs_block_grid_item title=”Block Grid Item 2″]AisleDo_KidsGift5[/cs_block_grid_item][cs_block_grid_item title=”Block Grid Item 1″]AisleDo_KidsGift6[/cs_block_grid_item][/cs_block_grid][/cs_column][/cs_row][/cs_section][cs_section parallax=”false” style=”margin: 0px;padding: 45px 0px;”][cs_row inner_container=”true” marginless_columns=”false” style=”margin: 0px auto;padding: 0px;”][cs_column fade=”false” fade_animation=”in” fade_animation_offset=”45px” fade_duration=”750″ type=”1/1″ style=”padding: 0px;”][cs_text]Step 3:   Place rolls of washi tapes inside the pack which the kid can use to decorate the letter assigned to him/her. (In this case, we use the initial of the kid’s first name.)[/cs_text][/cs_column][/cs_row][/cs_section][cs_section parallax=”false” style=”margin: 0px;padding: 45px 0px;”][cs_row inner_container=”true” marginless_columns=”false” style=”margin: 0px auto;padding: 0px;”][cs_column fade=”false” fade_animation=”in” fade_animation_offset=”45px” fade_duration=”750″ type=”1/1″ style=”padding: 0px;”][x_image type=”none” src=”http://weddingsatwork.com/wp-content/uploads/2016/06/AisleDo_KidsGift4.jpg” alt=”” link=”false” href=”#” title=”” target=”” info=”none” info_place=”top” info_trigger=”hover” info_content=””][/cs_column][/cs_row][/cs_section][cs_section parallax=”false” style=”margin: 0px;padding: 45px 0px;”][cs_row inner_container=”true” marginless_columns=”false” style=”margin: 0px auto;padding: 0px;”][cs_column fade=”false” fade_animation=”in” fade_animation_offset=”45px” fade_duration=”750″ type=”1/1″ style=”padding: 0px;”][cs_text]Step 4:   Label the activity pack to avoid confusion during the distribution.[/cs_text][/cs_column][/cs_row][/cs_section][cs_section parallax=”false” style=”margin: 0px;padding: 45px 0px;”][cs_row inner_container=”true” marginless_columns=”false” style=”margin: 0px auto;padding: 0px;”][cs_column fade=”false” fade_animation=”in” fade_animation_offset=”45px” fade_duration=”750″ type=”1/1″ style=”padding: 0px;”][cs_block_grid type=”three-up”][cs_block_grid_item title=”Block Grid Item 1″]AisleDo_KidsGift7[/cs_block_grid_item][cs_block_grid_item title=”Block Grid Item 2″]AisleDo_KidsGift8[/cs_block_grid_item][cs_block_grid_item title=”Block Grid Item 3″]AisleDo_KidsGift9[/cs_block_grid_item][/cs_block_grid][/cs_column][/cs_row][/cs_section][cs_section parallax=”false” style=”margin: 0px;padding: 45px 0px;”][cs_row inner_container=”true” marginless_columns=”false” style=”margin: 0px auto;padding: 0px;”][cs_column fade=”false” fade_animation=”in” fade_animation_offset=”45px” fade_duration=”750″ type=”1/1″ style=”padding: 0px;”][cs_text]Step 5:   Let the kids enjoy the activity.[/cs_text][/cs_column][/cs_row][/cs_section][cs_section parallax=”false” style=”margin: 0px;padding: 45px 0px;”][cs_row inner_container=”true” marginless_columns=”false” style=”margin: 0px auto;padding: 0px;”][cs_column fade=”false” fade_animation=”in” fade_animation_offset=”45px” fade_duration=”750″ type=”1/1″ style=”padding: 0px;”][x_image type=”none” src=”http://weddingsatwork.com/wp-content/uploads/2016/06/AisleDo_KidsGift10.jpg” alt=”” link=”false” href=”#” title=”” target=”” info=”none” info_place=”top” info_trigger=”hover” info_content=””][/cs_column][/cs_row][/cs_section][cs_section parallax=”false” style=”margin: 0px;padding: 45px 0px;”][cs_row inner_container=”true” marginless_columns=”false” style=”margin: 0px auto;padding: 0px;”][cs_column fade=”false” fade_animation=”in” fade_animation_offset=”45px” fade_duration=”750″ type=”1/1″ style=”padding: 0px;”][cs_text]Bespoke Tip: Put candies, chocolates and coloring sheets to keep the kids a lot busier. Have an extra bag or two for unexpected children attending the wedding reception.[/cs_text][/cs_column][/cs_row][/cs_section][cs_section parallax=”false” style=”margin: 0px;padding: 45px 0px;”][cs_row inner_container=”true” marginless_columns=”false” style=”margin: 0px auto;padding: 0px;”][cs_column fade=”false” fade_animation=”in” fade_animation_offset=”45px” fade_duration=”750″ type=”1/1″ style=”padding: 0px;”][cs_text]Read more of Ernest Pascual’s Aisle Do articles at weddingsatwork.com/category/aisle-do/.[/cs_text][/cs_column][/cs_row][/cs_section][/cs_content]
Aisle Do: Gift Wrapping

[cs_content][cs_section parallax=”false” style=”margin: 0px;padding: 45px 0px;”][cs_row inner_container=”true” marginless_columns=”false” style=”margin: 0px auto;padding: 0px;”][cs_column fade=”false” fade_animation=”in” fade_animation_offset=”45px” fade_duration=”750″ type=”1/1″ style=”padding: 0px;”][cs_text]In this column, Ernest Pascual of Bespoke Manila talks about how to DIY your gifts for your principal sponsors and wedding entourage. With the help of Adrian Ardiente for photos, Ernest shows you how to add these personalized touches for your wedding.[/cs_text][/cs_column][/cs_row][/cs_section][cs_section parallax=”false” style=”margin: 0px;padding: 45px 0px;”][cs_row inner_container=”true” marginless_columns=”false” style=”margin: 0px auto;padding: 0px;”][cs_column fade=”false” fade_animation=”in” fade_animation_offset=”45px” fade_duration=”750″ type=”1/1″ style=”padding: 0px;”][cs_text]Our aim is to give you and other soon-to-wed couples ideas on how you can personalize your wedding by undertaking easy and simple do-it-yourself (DIY) projects. We also want to help you create some lovely touches or details to make your nuptials extra special. We will tell you what materials to source, the step-by-step procedure, as well as show you how these crafted little items will look on wedding day.

Gift Wrapping

During weddings, the bride and the groom are not the only receivers of gifts. A considerate couple thinks of appropriate gifts to give to the principal sponsors and members of the wedding entourage.

Below are two ways by which you can dress up your gifts.[/cs_text][/cs_column][/cs_row][/cs_section][cs_section parallax=”false” style=”margin: 0px;padding: 45px 0px;”][cs_row inner_container=”true” marginless_columns=”false” style=”margin: 0px auto;padding: 0px;”][cs_column fade=”false” fade_animation=”in” fade_animation_offset=”45px” fade_duration=”750″ type=”1/1″ style=”padding: 0px;”][x_image type=”none” src=”http://weddingsatwork.com/wp-content/uploads/2016/06/AisleDo_V1GiftWrapping1.jpg” alt=”” link=”false” href=”#” title=”” target=”” info=”none” info_place=”top” info_trigger=”hover” info_content=””][/cs_column][/cs_row][/cs_section][cs_section parallax=”false” style=”margin: 0px;padding: 45px 0px;”][cs_row inner_container=”true” marginless_columns=”false” style=”margin: 0px auto;padding: 0px;”][cs_column fade=”false” fade_animation=”in” fade_animation_offset=”45px” fade_duration=”750″ type=”1/1″ style=”padding: 0px;”][cs_text]Here’s what you need:

  • Wrapping paper
  • A pair of scissors
  • Double-sided tape
  • Glue gun
  • Glue stick
  • Jewel stickers
  • Puncher
  • Washi tapes
  • Buttons and acrylic jewels
  • Boxes
  • Cupcake liners

Here’s how to do it.

Version 1

Step 1:   Put the gift inside a box. Cut the wrapping paper according to size.[/cs_text][/cs_column][/cs_row][/cs_section][cs_section parallax=”false” style=”margin: 0px;padding: 45px 0px;”][cs_row inner_container=”true” marginless_columns=”false” style=”margin: 0px auto;padding: 0px;”][cs_column fade=”false” fade_animation=”in” fade_animation_offset=”45px” fade_duration=”750″ type=”1/1″ style=”padding: 0px;”][x_image type=”none” src=”http://weddingsatwork.com/wp-content/uploads/2016/06/AisleDo_V1GiftWrapping2.jpg” alt=”” link=”false” href=”#” title=”” target=”” info=”none” info_place=”top” info_trigger=”hover” info_content=””][/cs_column][/cs_row][/cs_section][cs_section parallax=”false” style=”margin: 0px;padding: 45px 0px;”][cs_row inner_container=”true” marginless_columns=”false” style=”margin: 0px auto;padding: 0px;”][cs_column fade=”false” fade_animation=”in” fade_animation_offset=”45px” fade_duration=”750″ type=”1/1″ style=”padding: 0px;”][cs_text]Step 2:   Use double-sided tape on the wrapper to secure the gift.[/cs_text][/cs_column][/cs_row][/cs_section][cs_section parallax=”false” style=”margin: 0px;padding: 45px 0px;”][cs_row inner_container=”true” marginless_columns=”false” style=”margin: 0px auto;padding: 0px;”][cs_column fade=”false” fade_animation=”in” fade_animation_offset=”45px” fade_duration=”750″ type=”1/1″ style=”padding: 0px;”][x_image type=”none” src=”http://weddingsatwork.com/wp-content/uploads/2016/06/AisleDo_V1GiftWrapping3.jpg” alt=”” link=”false” href=”#” title=”” target=”” info=”none” info_place=”top” info_trigger=”hover” info_content=””][/cs_column][/cs_row][/cs_section][cs_section parallax=”false” style=”margin: 0px;padding: 45px 0px;”][cs_row inner_container=”true” marginless_columns=”false” style=”margin: 0px auto;padding: 0px;”][cs_column fade=”false” fade_animation=”in” fade_animation_offset=”45px” fade_duration=”750″ type=”1/1″ style=”padding: 0px;”][cs_text]Step 3:   Start sticking washi tapes on one side. Add washi tapes according to your preference and design. Place a “thank-you” card.[/cs_text][/cs_column][/cs_row][/cs_section][cs_section parallax=”false” style=”margin: 0px;padding: 45px 0px;”][cs_row inner_container=”true” marginless_columns=”false” style=”margin: 0px auto;padding: 0px;”][cs_column fade=”false” fade_animation=”in” fade_animation_offset=”45px” fade_duration=”750″ type=”1/1″ style=”padding: 0px;”][cs_block_grid type=”three-up”][cs_block_grid_item title=”Block Grid Item 1″]AisleDo_V1GiftWrapping4[/cs_block_grid_item][cs_block_grid_item title=”Block Grid Item 2″]AisleDo_V1GiftWrapping5[/cs_block_grid_item][cs_block_grid_item title=”Block Grid Item 3″]AisleDo_V1GiftWrapping6[/cs_block_grid_item][/cs_block_grid][/cs_column][/cs_row][/cs_section][cs_section parallax=”false” style=”margin: 0px;padding: 45px 0px;”][cs_row inner_container=”true” marginless_columns=”false” style=”margin: 0px auto;padding: 0px;”][cs_column fade=”false” fade_animation=”in” fade_animation_offset=”45px” fade_duration=”750″ type=”1/1″ style=”padding: 0px;”][cs_text]Step 4:   Embellish the project with jewel stickers.[/cs_text][/cs_column][/cs_row][/cs_section][cs_section parallax=”false” style=”margin: 0px;padding: 45px 0px;”][cs_row inner_container=”true” marginless_columns=”false” style=”margin: 0px auto;padding: 0px;”][cs_column fade=”false” fade_animation=”in” fade_animation_offset=”45px” fade_duration=”750″ type=”1/1″ style=”padding: 0px;”][x_image type=”none” src=”http://weddingsatwork.com/wp-content/uploads/2016/06/AisleDo_V1GiftWrapping7.jpg” alt=”” link=”false” href=”#” title=”” target=”” info=”none” info_place=”top” info_trigger=”hover” info_content=””][/cs_column][/cs_row][/cs_section][cs_section parallax=”false” style=”margin: 0px;padding: 45px 0px;”][cs_row inner_container=”true” marginless_columns=”false” style=”margin: 0px auto;padding: 0px;”][cs_column fade=”false” fade_animation=”in” fade_animation_offset=”45px” fade_duration=”750″ type=”1/1″ style=”padding: 0px;”][x_image type=”none” src=”http://weddingsatwork.com/wp-content/uploads/2016/06/AisleDo_V1GiftWrapping8.jpg” alt=”” link=”false” href=”#” title=”” target=”” info=”none” info_place=”top” info_trigger=”hover” info_content=””][/cs_column][/cs_row][/cs_section][cs_section parallax=”false” style=”margin: 0px;padding: 45px 0px;”][cs_row inner_container=”true” marginless_columns=”false” style=”margin: 0px auto;padding: 0px;”][cs_column fade=”false” fade_animation=”in” fade_animation_offset=”45px” fade_duration=”750″ type=”1/1″ style=”padding: 0px;”][cs_text]Version 2

Step 1:   Put the gift inside a box. Cut the wrapping paper according to size.[/cs_text][/cs_column][/cs_row][/cs_section][cs_section parallax=”false” style=”margin: 0px;padding: 45px 0px;”][cs_row inner_container=”true” marginless_columns=”false” style=”margin: 0px auto;padding: 0px;”][cs_column fade=”false” fade_animation=”in” fade_animation_offset=”45px” fade_duration=”750″ type=”1/1″ style=”padding: 0px;”][x_image type=”none” src=”http://weddingsatwork.com/wp-content/uploads/2016/06/AisleDo_V2GiftWrapping1.jpg” alt=”” link=”false” href=”#” title=”” target=”” info=”none” info_place=”top” info_trigger=”hover” info_content=””][/cs_column][/cs_row][/cs_section][cs_section parallax=”false” style=”margin: 0px;padding: 45px 0px;”][cs_row inner_container=”true” marginless_columns=”false” style=”margin: 0px auto;padding: 0px;”][cs_column fade=”false” fade_animation=”in” fade_animation_offset=”45px” fade_duration=”750″ type=”1/1″ style=”padding: 0px;”][cs_text]Step 2:   Use double sided-tape on the wrapper to secure the gift.[/cs_text][/cs_column][/cs_row][/cs_section][cs_section parallax=”false” style=”margin: 0px;padding: 45px 0px;”][cs_row inner_container=”true” marginless_columns=”false” style=”margin: 0px auto;padding: 0px;”][cs_column fade=”false” fade_animation=”in” fade_animation_offset=”45px” fade_duration=”750″ type=”1/1″ style=”padding: 0px;”][x_image type=”none” src=”http://weddingsatwork.com/wp-content/uploads/2016/06/AisleDo_V2GiftWrapping2.jpg” alt=”” link=”false” href=”#” title=”” target=”” info=”none” info_place=”top” info_trigger=”hover” info_content=””][/cs_column][/cs_row][/cs_section][cs_section parallax=”false” style=”margin: 0px;padding: 45px 0px;”][cs_row inner_container=”true” marginless_columns=”false” style=”margin: 0px auto;padding: 0px;”][cs_column fade=”false” fade_animation=”in” fade_animation_offset=”45px” fade_duration=”750″ type=”1/1″ style=”padding: 0px;”][cs_text]Step 3:   Put ribbons in a criss-cross direction. Place a “thank-you” card.[/cs_text][/cs_column][/cs_row][/cs_section][cs_section parallax=”false” style=”margin: 0px;padding: 45px 0px;”][cs_row inner_container=”true” marginless_columns=”false” style=”margin: 0px auto;padding: 0px;”][cs_column fade=”false” fade_animation=”in” fade_animation_offset=”45px” fade_duration=”750″ type=”1/1″ style=”padding: 0px;”][cs_block_grid type=”two-up”][cs_block_grid_item title=”Block Grid Item 1″]AisleDo_V2GiftWrapping3[/cs_block_grid_item][cs_block_grid_item title=”Block Grid Item 2″]AisleDo_V2GiftWrapping5[/cs_block_grid_item][/cs_block_grid][/cs_column][/cs_row][/cs_section][cs_section parallax=”false” style=”margin: 0px;padding: 45px 0px;”][cs_row inner_container=”true” marginless_columns=”false” style=”margin: 0px auto;padding: 0px;”][cs_column fade=”false” fade_animation=”in” fade_animation_offset=”45px” fade_duration=”750″ type=”1/1″ style=”padding: 0px;”][cs_text]Step 4:   Adorn the project with folded cupcake liners, jewel stickers, and buttons.[/cs_text][/cs_column][/cs_row][/cs_section][cs_section parallax=”false” style=”margin: 0px;padding: 45px 0px;”][cs_row inner_container=”true” marginless_columns=”false” style=”margin: 0px auto;padding: 0px;”][cs_column fade=”false” fade_animation=”in” fade_animation_offset=”45px” fade_duration=”750″ type=”1/1″ style=”padding: 0px;”][x_image type=”none” src=”http://weddingsatwork.com/wp-content/uploads/2016/06/AisleDo_V2GiftWrapping4.jpg” alt=”” link=”false” href=”#” title=”” target=”” info=”none” info_place=”top” info_trigger=”hover” info_content=””][/cs_column][/cs_row][/cs_section][cs_section parallax=”false” style=”margin: 0px;padding: 45px 0px;”][cs_row inner_container=”true” marginless_columns=”false” style=”margin: 0px auto;padding: 0px;”][cs_column fade=”false” fade_animation=”in” fade_animation_offset=”45px” fade_duration=”750″ type=”1/1″ style=”padding: 0px;”][x_image type=”none” src=”http://weddingsatwork.com/wp-content/uploads/2016/06/AisleDo_V2GiftWrapping6.jpg” alt=”” link=”false” href=”#” title=”” target=”” info=”none” info_place=”top” info_trigger=”hover” info_content=””][/cs_column][/cs_row][/cs_section][cs_section parallax=”false” style=”margin: 0px;padding: 45px 0px;”][cs_row inner_container=”true” marginless_columns=”false” style=”margin: 0px auto;padding: 0px;”][cs_column fade=”false” fade_animation=”in” fade_animation_offset=”45px” fade_duration=”750″ type=”1/1″ style=”padding: 0px;”][cs_text]Bespoke Tip: Always place your gift inside a box. Assign your coordinator to distribute the gifts on your behalf. If you haven’t hired one, ask your bridesmaids to do this task.[/cs_text][/cs_column][/cs_row][/cs_section][cs_section parallax=”false” style=”margin: 0px;padding: 45px 0px;”][cs_row inner_container=”true” marginless_columns=”false” style=”margin: 0px auto;padding: 0px;”][cs_column fade=”false” fade_animation=”in” fade_animation_offset=”45px” fade_duration=”750″ type=”1/1″ style=”padding: 0px;”][cs_text]Read more of Ernest Pascual’s Aisle Do articles at weddingsatwork.com/category/aisle-do/.[/cs_text][/cs_column][/cs_row][/cs_section][/cs_content]

WAW Wedding Tip Sheet: Anatomy of an Evening Wedding

[cs_content][cs_section parallax=”false” style=”margin: 0px;padding: 45px 0px;”][cs_row inner_container=”true” marginless_columns=”false” style=”margin: 0px auto;padding: 0px;”][cs_column fade=”false” fade_animation=”in” fade_animation_offset=”45px” fade_duration=”750″ type=”1/1″ style=”padding: 0px;”][cs_text]While some chose a morning slot and others went for the popular afternoon slot, you decided to go for an evening ceremony slot.

What’s the usual timeline? Let’s tackle the 7PM ceremony time since a lot of churches reserve their 6PM slot for angelus, the rosary, and a public mass.
[/cs_text][/cs_column][/cs_row][/cs_section][cs_section parallax=”false” style=”margin: 0px;padding: 45px 0px;”][cs_row inner_container=”true” marginless_columns=”false” style=”margin: 0px auto;padding: 0px;”][cs_column fade=”false” fade_animation=”in” fade_animation_offset=”45px” fade_duration=”750″ type=”1/1″ style=”padding: 0px;”][x_image type=”none” src=”http://weddingsatwork.com/wp-content/uploads/2016/06/AnatomyofanEveningWedding3.jpg” alt=”” link=”false” href=”#” title=”” target=”” info=”none” info_place=”top” info_trigger=”hover” info_content=””][/cs_column][/cs_row][/cs_section][cs_section parallax=”false” style=”margin: 0px;padding: 45px 0px;”][cs_row inner_container=”true” marginless_columns=”false” style=”margin: 0px auto;padding: 0px;”][cs_column fade=”false” fade_animation=”in” fade_animation_offset=”45px” fade_duration=”750″ type=”1/1″ style=”padding: 0px;”][cs_text]12:30 PM – Set up of the hair and make-up team
1:00 PM – Make-up starts in the bride’s room — assuming bride plus 2 or 3 heads
2:00 PM/2:30 PM – Arrival of the photo and video teams
3:00 PM – Snack delivery arrives (staggered snack schedule for all)
3:30 PM – Pictorials of the groom’s side
4:30 PM – Pictorials of the bride’s side
5:30 PM – Leaving time of the groom and his side (since those going to the ceremony usually expect the groom to be there earlier than the bride)
6:00 PM – Leaving time of the bride and her side (assuming her preps place is pretty close to the ceremony venue)
6:30 PM – Invitation time
7:00 PM – Ceremony time
8:00 PM – End of ceremony; Start of group pictorials
8:30 PM – Recessional and start of couple pictorials
9:00 PM – Cocktails
10:00 PM – Start of programme
10:30 PM – Dinner Time
12:00 MN – End of programme[/cs_text][/cs_column][/cs_row][/cs_section][cs_section parallax=”false” style=”margin: 0px;padding: 45px 0px;”][cs_row inner_container=”true” marginless_columns=”false” style=”margin: 0px auto;padding: 0px;”][cs_column fade=”false” fade_animation=”in” fade_animation_offset=”45px” fade_duration=”750″ type=”1/1″ style=”padding: 0px;”][x_image type=”none” src=”http://weddingsatwork.com/wp-content/uploads/2016/06/AnatomyofanEveningWedding2-1.jpg” alt=”” link=”false” href=”#” title=”” target=”” info=”none” info_place=”top” info_trigger=”hover” info_content=””][/cs_column][/cs_row][/cs_section][cs_section parallax=”false” style=”margin: 0px;padding: 45px 0px;”][cs_row inner_container=”true” marginless_columns=”false” style=”margin: 0px auto;padding: 0px;”][cs_column fade=”false” fade_animation=”in” fade_animation_offset=”45px” fade_duration=”750″ type=”1/1″ style=”padding: 0px;”][cs_text]What is good?

a) If you’re not getting a peak date, you might be able to get away with just checking in early and booking your rooms for just a night instead of the usual 2 nights of other time slots.

b) People might be willing to go to your ceremony and reception even if it’s a week night because they can still go to work for half the day or even the whole day then just go to your event after work/school. (Staying on and finishing the programme might be a different story though, especially if the next day is a school/work day.)

c) This time slot is good for those who want intimate weddings. Since it’s not a common time slot, the couple can invite only those who are really close to them — the kind who would be willing to sacrifice and sleep late.

d) You can request people to wear formal attire and even jewel toned hues since you’re having an evening affair. (However, do note that you will need to spend as well for the formality of the attire of your entourage due to the time slot.)

e) If you want a fireworks display, this would be the perfect time slot. You can have it before people enter the venue, i.e. during cocktails, since you don’t need to wait for darkness.

f) You don’t really need to prepare for after party or have a band since you aren’t expecting a lot to stay beyond programme time. However, do check if yours is a crowd that parties till the wee hours. Then you’d have to prepare alcoholic drinks and at the least, a DJ who will keep the music going.[/cs_text][/cs_column][/cs_row][/cs_section][cs_section parallax=”false” style=”margin: 0px;padding: 45px 0px;”][cs_row inner_container=”true” marginless_columns=”false” style=”margin: 0px auto;padding: 0px;”][cs_column fade=”false” fade_animation=”in” fade_animation_offset=”45px” fade_duration=”750″ type=”1/1″ style=”padding: 0px;”][x_image type=”none” src=”http://weddingsatwork.com/wp-content/uploads/2016/06/AnatomyofanEveningWedding4.jpg” alt=”” link=”false” href=”#” title=”” target=”” info=”none” info_place=”top” info_trigger=”hover” info_content=””][/cs_column][/cs_row][/cs_section][cs_section parallax=”false” style=”margin: 0px;padding: 45px 0px;”][cs_row inner_container=”true” marginless_columns=”false” style=”margin: 0px auto;padding: 0px;”][cs_column fade=”false” fade_animation=”in” fade_animation_offset=”45px” fade_duration=”750″ type=”1/1″ style=”padding: 0px;”][cs_text]What do you need to prepare for?

a) Hunger… Some might not have taken their snacks to get to your wedding on time or if it’s a week day, they may have rushed through office/school work foregoing meals just to make it on time, so you do need to provide substantial food during cocktail hour. Note also that cocktail hour is also past dinner time already since your ceremony happened during dinner time. It’s a good idea to talk to your caterer re: opening the soup and salad area or a particular food station so people will be willing to wait for the main meal without getting cranky. If you’re having a hotel reception, you can opt for sit down service and request that the first course be served even before the official start of programme, just so people have something to tide them over beyond the usual nuts and chips during cocktails.

b) Shorter pictorials after ceremony… Since people are waiting and it’s late, you will not have the luxury of having time for pictorials. Also, you won’t have natural light. So, it might be a good idea to have a “first look” type of pictorial prior to the ceremony — only if your parents will allow you to be less traditional, i.e. you will see your groom already prior to the walk down the aisle. This will help in terms of lessening the waiting time of guests.

c) Since it’s not the usual type of time slot, you will need to hire really efficient suppliers since you will not have much room for schedule errors. Even the onsite photo/video editor needs to be the type who can finish quickly without sacrificing quality. That way, no need to stall or needlessly lengthen the programme just to wait for the said AVPs.[/cs_text][/cs_column][/cs_row][/cs_section][cs_section parallax=”false” style=”margin: 0px;padding: 45px 0px;”][cs_row inner_container=”true” marginless_columns=”false” style=”margin: 0px auto;padding: 0px;”][cs_column fade=”false” fade_animation=”in” fade_animation_offset=”45px” fade_duration=”750″ type=”1/1″ style=”padding: 0px;”][x_image type=”none” src=”http://weddingsatwork.com/wp-content/uploads/2016/06/AnatomyofanEveningWedding1.jpg” alt=”” link=”false” href=”#” title=”” target=”” info=”none” info_place=”top” info_trigger=”hover” info_content=””][/cs_column][/cs_row][/cs_section][cs_section parallax=”false” style=”margin: 0px;padding: 45px 0px;”][cs_row inner_container=”true” marginless_columns=”false” style=”margin: 0px auto;padding: 0px;”][cs_column fade=”false” fade_animation=”in” fade_animation_offset=”45px” fade_duration=”750″ type=”1/1″ style=”padding: 0px;”][cs_text]Bottomline:

No other time slot demands sticking to the schedule and being quick than an evening wedding. There is hardly any room for error and for tardiness as well as their domino effects, so it’s imperative to hire efficient suppliers and invite only those who really love you enough to adjust to the rigors of this time slot.


Note from the W@W Team: Read the Anatomy of a Morning Wedding here and the Anatomy of an Afternoon wedding hereFind more of Darlene Tan-Salazar’s Wedding Tip Sheet articles at www.weddingsatwork.com/category/waw-wedding-tip-sheet/.[/cs_text][/cs_column][/cs_row][/cs_section][cs_section parallax=”false” style=”margin: 0px;padding: 45px 0px;”][cs_row inner_container=”true” marginless_columns=”false” style=”margin: 0px auto;padding: 0px;”][cs_column fade=”false” fade_animation=”in” fade_animation_offset=”45px” fade_duration=”750″ type=”1/1″ style=”padding: 0px;”][cs_block_grid type=”two-up”][cs_block_grid_item title=”Block Grid Item 1″]About Darlene Tan-Salazar, W@W Supplier of Year (2015): Darlene started out as a Planner/Coordinator of Perfect 10 Weddings. Since she needed more time for family matters, she opted to focus on emceeing, and has since started “The Wedding Tip Sheet“, a Facebook page that tackles the practical points in planning a wedding.[/cs_block_grid_item][cs_block_grid_item title=”Block Grid Item 2″]wedding-tip-sheet[/cs_block_grid_item][/cs_block_grid][/cs_column][/cs_row][/cs_section][/cs_content]

WaW Wedding Tip Sheet: Anatomy of an Afternoon Wedding

[cs_content][cs_section parallax=”false” style=”margin: 0px;padding: 45px 0px;”][cs_row inner_container=”true” marginless_columns=”false” style=”margin: 0px auto;padding: 0px;”][cs_column fade=”false” fade_animation=”in” fade_animation_offset=”45px” fade_duration=”750″ type=”1/1″ style=”padding: 0px;”][cs_text]You’ve said “yes” to his proposal and now it’s time to choose your time slot. As you pondered over which would be best, popular opinion took over your choice and you want for the so-called safest bet: the 3:00 PM ceremony slot.

What’s the usual timeline? Read on.[/cs_text][/cs_column][/cs_row][/cs_section][cs_section parallax=”false” style=”margin: 0px;padding: 45px 0px;”][cs_row inner_container=”true” marginless_columns=”false” style=”margin: 0px auto;padding: 0px;”][cs_column fade=”false” fade_animation=”in” fade_animation_offset=”45px” fade_duration=”750″ type=”1/1″ style=”padding: 0px;”][x_image type=”none” src=”http://weddingsatwork.com/wp-content/uploads/2016/05/AnatomyOfAnAfternoonWedding1.jpg” alt=”” link=”false” href=”#” title=”” target=”” info=”none” info_place=”top” info_trigger=”hover” info_content=””][/cs_column][/cs_row][/cs_section][cs_section parallax=”false” style=”margin: 0px;padding: 45px 0px;”][cs_row inner_container=”true” marginless_columns=”false” style=”margin: 0px auto;padding: 0px;”][cs_column fade=”false” fade_animation=”in” fade_animation_offset=”45px” fade_duration=”750″ type=”1/1″ style=”padding: 0px;”][cs_text]7:00 a.m. – Wake up, take a bath, breakfast

8:30 a.m. – Arrival of hair and make-up artist to set-up shop in the bride’s room (Yes, everyone will have to come over for their styling needs except the groom – the HMUA does not need to bring much anyway when styling the groom.)

9:00 a.m. – Make-up begins (assuming you have the usual bride plus 2 or 3 plus groom; 1 hair stylist and 1 make up artist)

It would most likely go this way: both mothers at 9:00 a.m., then at 10:00 a.m., the bride starts with either hair or make-up. The other head would be on stand by to take the other chair, for instance, if the bride’s hair is being styled, the other lady, usually the maid of honor, sits on the chair of the make-up artist.

You know what’s great about this time slot? Your girls/entourage can actually go to their respective parlors or make-up artists because the preps won’t happen at ungodly hours. No need to have a crowded hotel room from start of preps till pictorial.

11:00 a.m. – Lunch arrives (If to be delivered, so everyone can start having lunch – staggered basis, but the groom and family members are usually asked to eat right away since their pictorials will start earlier.)

11:30 a.m. – Groom’s pictorials (The groom should not be wearing his groom’s attire yet, those are part of the shoot.)

12:30 a.m. – Bride’s pictorials (The bride should have eaten before this time, the same is requested of her family – only the family and entourage should be wearing their wedding attire; the bride will have to wait for instructions.)[/cs_text][/cs_column][/cs_row][/cs_section][cs_section parallax=”false” style=”margin: 0px;padding: 45px 0px;”][cs_row inner_container=”true” marginless_columns=”false” style=”margin: 0px auto;padding: 0px;”][cs_column fade=”false” fade_animation=”in” fade_animation_offset=”45px” fade_duration=”750″ type=”1/1″ style=”padding: 0px;”][x_image type=”none” src=”http://weddingsatwork.com/wp-content/uploads/2016/05/AnatomyOfAnAfternoonWedding2.jpg” alt=”” link=”false” href=”#” title=”” target=”” info=”none” info_place=”top” info_trigger=”hover” info_content=””][/cs_column][/cs_row][/cs_section][cs_section parallax=”false” style=”margin: 0px;padding: 45px 0px;”][cs_row inner_container=”true” marginless_columns=”false” style=”margin: 0px auto;padding: 0px;”][cs_column fade=”false” fade_animation=”in” fade_animation_offset=”45px” fade_duration=”750″ type=”1/1″ style=”padding: 0px;”][cs_text]2:00 p.m. – Bride leaves for church

2:30 p.m. – Arrival at the church; assembly and line up (Also the time stated in the invitation)

3:00 p.m. – Ceremony time

4:00 p.m. – End of ceremony, Group pictorials

4:30 p.m. – Recessional. Guests will travel to the reception venue. Bride and groom will have pictorials together.

5:00 p.m. – Cocktail time at the reception venue
*Upon arrival, the bride and groom may continue the shoot or go straight to the room for retouch and a light meal.

6:00 p.m. / 6:30 p.m. – Start of program

6:30 p.m. / 7:00 p.m. – Dinner

8:00 p.m. / 8:30 p.m. – Party time[/cs_text][/cs_column][/cs_row][/cs_section][cs_section parallax=”false” style=”margin: 0px;padding: 45px 0px;”][cs_row inner_container=”true” marginless_columns=”false” style=”margin: 0px auto;padding: 0px;”][cs_column fade=”false” fade_animation=”in” fade_animation_offset=”45px” fade_duration=”750″ type=”1/1″ style=”padding: 0px;”][x_image type=”none” src=”http://weddingsatwork.com/wp-content/uploads/2016/05/AnatomyOfAnAfternoonWedding3.jpg” alt=”” link=”false” href=”#” title=”” target=”” info=”none” info_place=”top” info_trigger=”hover” info_content=””][/cs_column][/cs_row][/cs_section][cs_section parallax=”false” style=”margin: 0px;padding: 45px 0px;”][cs_row inner_container=”true” marginless_columns=”false” style=”margin: 0px auto;padding: 0px;”][cs_column fade=”false” fade_animation=”in” fade_animation_offset=”45px” fade_duration=”750″ type=”1/1″ style=”padding: 0px;”][cs_text]What details do you need to take into consideration?

a) Your attrition rate could be lower when you get their responses via your coordinator’s RSVP report. Why? Because this is the most common time slot — people expect to go out in the afternoon (2/3/4 p.m.) on a Saturday or even a Sunday. They won’t mind going to your wedding.

If you really can’t invite too many but you really can’t handle the early preps of a morning wedding, you can choose to have a weekday afternoon wedding. Even a Sunday wedding would most likely yield fewer “yes” responses than a Saturday afternoon wedding.

b) Given that your preps would cut into lunch time, you can expect that some will decide to forego lunch in favor of getting dolled up. So yes, provide heavy cocktail food items as well. These are especially necessary since your post-nuptial shoot + retouch & eating time will take longer than the usual cocktail hour. If you will go beyond the maximum waiting time of 1.5 hours — open the soup and salad station as well. However, note that not all caterers/venues allow this option.

Since your time slot takes up snack time and dinner, you can really expect to provide more food. If you can get away with 3 viands for a lunch time reception, you may not be able to do the same now. People will expect a bit more since you’re providing dinner — minimum of 4 courses plus dessert, salad, and soup.

c) Expenses could go higher as you might feel compelled to hire a band for entertainment and party time, and hire a mobile bar or bring in additional booze for your guests. You may also feel the need to have more elegant evening gowns (long & with bling-bling) for your entourage. Your male entourage will most likely look more dapper in suits as well.

d) This is the only time slot though that gives you a bit more leeway in terms of post ceremony pictorials. People won’t pressure you to serve dinner right away especially if you will provide cocktail food items that aren’t just plain nuts and chips. Dinner is at 7:00 p.m. traditionally so if they get to the venue at 5:00 p.m., they won’t expect dinner, unlike a morning wedding wherein they will arrive at almost the exact moment they expect to have lunch. They are also crankier during lunch events coz it’s generally warmer unlike afternoon ceremonies which usually end when it is much cooler already.

e) You can go all the way with mood lighting and even fireworks. Plus you can get even a 3,000-ANSI projector and people will still see the AVP. Note though that the recommended ANSI lumens is around 4,500 to 5,000 so the colors are more vivid.

f) You can expect a few more guests to stay longer for party time since it’s neither too early nor too late. Of course, if you will go for a weekday, your end time will be just right — enough time for them to travel to their homes and rest for the next day’s school and work challenges.

Although you can expect guests to have a better tolerance for the program and its contents, do try to stay within the usual 1.5-hour maximum cocktail time and 2-hour program. That way, you won’t end up with a near empty hall by the time you will show your SDE or give your final speech.[/cs_text][/cs_column][/cs_row][/cs_section][cs_section parallax=”false” style=”margin: 0px;padding: 45px 0px;”][cs_row inner_container=”true” marginless_columns=”false” style=”margin: 0px auto;padding: 0px;”][cs_column fade=”false” fade_animation=”in” fade_animation_offset=”45px” fade_duration=”750″ type=”1/1″ style=”padding: 0px;”][x_image type=”none” src=”http://weddingsatwork.com/wp-content/uploads/2016/05/AnatomyOfAnAfternoonWedding4.jpg” alt=”” link=”false” href=”#” title=”” target=”” info=”none” info_place=”top” info_trigger=”hover” info_content=””][/cs_column][/cs_row][/cs_section][cs_section parallax=”false” style=”margin: 0px;padding: 45px 0px;”][cs_row inner_container=”true” marginless_columns=”false” style=”margin: 0px auto;padding: 0px;”][cs_column fade=”false” fade_animation=”in” fade_animation_offset=”45px” fade_duration=”750″ type=”1/1″ style=”padding: 0px;”][cs_text]Other points to consider:

1) For garden & beach weddings, it is best to follow the timeline below:

3:30 p.m. – Invitation time (An earlier time would cause guests to fry and bake.)
4:00 p.m. – Ceremony
5:30 p.m. – Recessional (No extension for additional group pictorials.)
5:30 to 6:00 p.m. – Couple pictorials (while there’s still a bit of sun)

2) For those having weekday or Sunday weddings, please do not choose a wedding time of 5:00 p.m. Stick to 2/3/4 p.m. That way, you can still expect people to finish the program. A 1:00 p.m. wedding really cuts through lunch so it’s not very advisable as well.

3) While a lunch wedding reception can’t occur in an open air venue, a late afternoon to evening reception can take place at a garden or by the beach. Do provide fans and the like to make everyone a bit more comfortable.

4) Give yourself enough time to plan (read: a year or more) so you can get these coveted afternoon ceremony and early evening reception slots. They go so quickly. Sometimes, even if you just dilly dally for a few hours, someone will snatch the slot away and you’d end up either changing your date or going for the so-called less desirable time slots.

5) Get enough sleep the night before your wedding. The wake up time is not too early so there’s really no excuse to come to your reception looking sleepy or groggy.

BOTTOMLINE:

This is the time slot people expect, so it’s going to be pretty easy to invite guests. However, there is more competition for venues and suppliers so couples who wish to have this coveted slot should start booking ahead of everyone, i.e. 1 year to 1.5 years ahead of the date, especially if it falls on a Saturday. People will be in the mood to party so you can go for everything – elegant clothes, a band, lots of booze, and the like.[/cs_text][/cs_column][/cs_row][/cs_section][cs_section parallax=”false” style=”margin: 0px;padding: 45px 0px;”][cs_row inner_container=”true” marginless_columns=”false” style=”margin: 0px auto;padding: 0px;”][cs_column fade=”false” fade_animation=”in” fade_animation_offset=”45px” fade_duration=”750″ type=”1/1″ style=”padding: 0px;”][cs_text]Note from the WaW Team: Having a morning wedding? Read the Anatomy of a Morning wedding here and the Anatomy of an Evening Wedding here.

Read more of Darlene Tan-Salazar’s Wedding Tip Sheet articles at www.weddingsatwork.com/category/waw-wedding-tip-sheet/.

 [/cs_text][/cs_column][/cs_row][/cs_section][cs_section parallax=”false” style=”margin: 0px;padding: 45px 0px;”][cs_row inner_container=”true” marginless_columns=”false” style=”margin: 0px auto;padding: 0px;”][cs_column fade=”false” fade_animation=”in” fade_animation_offset=”45px” fade_duration=”750″ type=”1/1″ style=”padding: 0px;”][cs_block_grid type=”two-up”][cs_block_grid_item title=”Block Grid Item 1″]About Darlene Tan-Salazar, W@W Supplier of Year (2015): Darlene started out as a Planner/Coordinator of Perfect 10 Weddings. Since she needed more time for family matters, she opted to focus on emceeing, and has since started “The Wedding Tip Sheet“, a Facebook page that tackles the practical points in planning a wedding.[/cs_block_grid_item][cs_block_grid_item title=”Block Grid Item 2″]wedding-tip-sheet[/cs_block_grid_item][/cs_block_grid][/cs_column][/cs_row][/cs_section][/cs_content]

WaW Wedding Tip Sheet: Anatomy of a Morning Wedding

[cs_content][cs_section parallax=”false” style=”margin: 0px;padding: 45px 0px;”][cs_row inner_container=”true” marginless_columns=”false” style=”margin: 0px auto;padding: 0px;”][cs_column fade=”false” fade_animation=”in” fade_animation_offset=”45px” fade_duration=”750″ type=”1/1″ style=”padding: 0px;”][cs_text]While many would opt for a 10:00 a.m. slot, I decided to focus this post on the most ideal time slot, the 9:00 a.m. ceremony.

What’s the usual timeline? Read on.

2:00 a.m. – Wake up, take a bath
2:30 a.m. – Set up of HMUA stations (one for make-up, one for hair)
3:00 a.m. – Make-up begins (assuming you have the usual bride plus 2 or 3 plus groom; 1 hair stylist and 1 make up artist)
4:00 a.m. – Breakfast arrives (Check if the hotel allows such an arrangement.)
5:30 a.m. – Groom’s pictorials (The groom would still be in his prep clothes by the time the p/v team transfers to his room for his pictorial with family; the rest though – family and entourage should be dressed and ready to take part in the shoot by this time.)
6:30 a.m. – Bride’s pictorials (The bride would be in preps clothes at this point while the rest should be dressed and ready to participate in the shoot.)
8:00 a.m. – Bride leaves for church
8:30 a.m. – Arrival at the church; assembly and line up (also your invite time)
9:00 a.m. – Ceremony time
10:30 a.m. – Recessional
11:00 a.m. – Cocktail time
12:00 p.m./12:30 p.m. – Start of program (This makes the 9:00 a.m. slot ideal. Your program will not be too late for lunch.)
12:30/1:00 p.m. – Lunch
2:00/2:30 p.m. – Party time/End of program[/cs_text][/cs_column][/cs_row][/cs_section][cs_section parallax=”false” style=”margin: 0px;padding: 45px 0px;”][cs_row inner_container=”true” marginless_columns=”false” style=”margin: 0px auto;padding: 0px;”][cs_column fade=”false” fade_animation=”in” fade_animation_offset=”45px” fade_duration=”750″ type=”1/1″ style=”padding: 0px;”][x_image type=”none” src=”http://weddingsatwork.com/wp-content/uploads/2016/04/WaWWeddingTipSheet_MorningWedding2-e1461933967395.jpg” alt=”” link=”false” href=”#” title=”” target=”” info=”none” info_place=”right” info_trigger=”hover” info_content=””][/cs_column][/cs_row][/cs_section][cs_section parallax=”false” style=”margin: 0px;padding: 45px 0px;”][cs_row inner_container=”true” marginless_columns=”false” style=”margin: 0px auto;padding: 0px;”][cs_column fade=”false” fade_animation=”in” fade_animation_offset=”45px” fade_duration=”750″ type=”1/1″ style=”padding: 0px;”][cs_text]What details do you need to take into consideration?

a) Your attrition rate could be higher when you get their responses via your coordinator’s RSVP report. Why? Because this time slot requires everyone to wake up pretty early and if your wedding is on a weekend, some may not be willing to get up even earlier than they would on a week day. Nonetheless, if you really wanted an intimate gathering anyway, the lower number of attendees would be ideal.

b) If your wedding is on a weekday, you will have to brace yourself for traffic, so you may need to allot more time for travel between the hotel and ceremony venue & between the ceremony area and the reception venue. It will help to book places that are really close together.

c) Note that the early preps would most likely require you to have extra space for your entourage to have their make up done there in your hotel. Maybe a 2-bedroom suite would be better than a 1-bedroom suite. You see, it’s hard for them to visit their friendly neighborhood parlors at such an ungodly hour like 3 or 4 a.m. Best to hire a team for your entourage. Do not forget to give the exact number of heads in advance so the HMUA team can bring the right number of people as well.

d) Given that their preps would cut into breakfast time, you can expect that some decided to forego breakfast in favor of getting dolled up. So yes, provide heavy cocktail food items to compensate for the breakfast they missed. These are especially necessary since your post-nup shoot + retouch & eating time will take longer than the usual cocktail hour. If you will go beyond the maximum waiting time of 1.5 hours — open the soup and salad station as well. Find out if the caterer/venue allows this kind of arrangement though, some don’t give in to such a request.

e) Expenses could go lower since you will not need to spend too much.
– On clothes (No need to have suits. Suspenders or vests would be fine; dresses could be knee length or may reach mid-calf only, no need for long gowns and bling.);
– On booze (In fact, no need for alcohol because people don’t necessarily look for an alcoholic fix during lunch.);
– On entertainment (no need to have a full band, strings would do);
– On lights (Especially if the venue allows the sun to filter in), and
– On food (It’s a lunch reception, so you can go with comfort food, not necessarily steak and other expensive dishes. You can even get away with brunch type meals.)

f) However, despite the savings, you may expect to spend on an LED wall instead of a projector and screen combo because it might not be possible to see AVPs on a projection screen if the sun filters into the venue.

g) This is a time slot that does not allow for punctuality-related problems. You can’t be late for preps because it would create a domino effect and guests won’t appreciate having lunch at 1:30 or 2:00 p.m. — although this time slot is one you can’t avoid with a 10:00 a.m. wedding ceremony.

h) People are also more inclined to go home after eating because they are sleepy or they have other stuff scheduled in the afternoon. They usually expect the event to be done by 2:00 p.m., and they aren’t usually in the mood to party since by 2:00 p.m., some may have been awake already for 10 to 12 hours.

i) You can’t have fireworks but you can always have confetti, which would cost a lot less.

j) This one is most important: get enough sleep. Do your best to check in on time, relax, and sleep earlier than usual. It won’t help to have too many people in your room. So do your best to have only a few individuals, and do not attempt to finish DIYs and forego sleep. Give yourself at least 6 hours of sleep so you can handle the rigors of your big day.
[/cs_text][/cs_column][/cs_row][/cs_section][cs_section parallax=”false” style=”margin: 0px;padding: 45px 0px;”][cs_row inner_container=”true” marginless_columns=”false” style=”margin: 0px auto;padding: 0px;”][cs_column fade=”false” fade_animation=”in” fade_animation_offset=”45px” fade_duration=”750″ type=”1/1″ style=”padding: 0px;”][x_image type=”none” src=”http://weddingsatwork.com/wp-content/uploads/2016/04/WaWWeddingTipSheet_MorningWedding1-e1461934105696.jpg” alt=”” link=”false” href=”#” title=”” target=”” info=”none” info_place=”top” info_trigger=”hover” info_content=””][/cs_column][/cs_row][/cs_section][cs_section parallax=”false” style=”margin: 0px;padding: 45px 0px;”][cs_row inner_container=”true” marginless_columns=”false” style=”margin: 0px auto;padding: 0px;”][cs_column fade=”false” fade_animation=”in” fade_animation_offset=”45px” fade_duration=”750″ type=”1/1″ style=”padding: 0px;”][cs_text]Other points to consider:

Ceremony Time Constraints:

If your chosen church only has a 10:00 a.m. slot or worse, a 10:30 a.m. slot, you might want to consider either of the ff:

1) Go for couple pictorials prior to the ceremony — check first if your parents are ok with this.

OR

2) Go for couple pictorials after the reception – you will have to make arrangements in advance with your photo, video, and HMUA teams.

Both measures are designed to make the waiting time shorter. Of course, you can always provide heavy cocktails for waiting time.

10:00 a.m. – Ceremony
11:30 a.m. – Recessional
12:00 NN – Cocktails
1:00/1:30 p.m. – Start of programme
1:30/2:00 p.m. – Start of meal time
3:00/3:30 p.m. – End of programme

For a 10:30 a.m. slot, cocktails will be at 12:30 p.m., programme will start at 2:00 p.m., and lunch will be at 2:30 p.m. End of programme will be at 4:00 p.m..

For garden & beach weddings, it is best to follow the timeline below:

6:30 a.m. – Invitation time
7:00 a.m. – Ceremony time
8:30 a.m. – Recessional
9:00 a.m. – Cocktails
10:30 a.m. – Program starts
11:00 a.m. – Lunch
12:30 p.m. – End of program

You may also adjust:

7:00 a.m. – Invite time
7:30 a.m. – Ceremony
9:00 a.m. – Recessional
9:30 a.m. – Cocktails
11:00 a.m. – Program
11:30 a.m. – Lunch
1:00 p.m. – End of program

However, if you’re having a garden or beach wedding, please make sure you have a covered, air-conditioned area for the reception. It won’t be fair to have people stay under the scorching and deadly heat of the sun for reception. Usually the heat can still be a bit bearable before 9:00 a.m.

Do provide fans and the like to make everyone a bit more comfortable during the ceremony. Reserve part of the budget also for getting a tent to ensure protection from the harsh rays of the sun.

BOTTOMLINE:

Overall, this is a time slot that is supposed to save you money. It takes away a lot of things you may find necessary given evening receptions. It also usually lessens the need to invite too many guests — it caters to those who want intimate celebrations.
[/cs_text][/cs_column][/cs_row][/cs_section][cs_section parallax=”false” style=”margin: 0px;padding: 45px 0px;”][cs_row inner_container=”true” marginless_columns=”false” style=”margin: 0px auto;padding: 0px;”][cs_column fade=”false” fade_animation=”in” fade_animation_offset=”45px” fade_duration=”750″ type=”1/1″ style=”padding: 0px;”][cs_text]Note from the W@W Team: Having an afternoon wedding? Read the Anatomy of an Afternoon wedding here and the Anatomy of an Evening Wedding here.

Read more of Darlene Tan-Salazar’s Wedding Tip Sheet articles at www.weddingsatwork.com/category/waw-wedding-tip-sheet/.[/cs_text][/cs_column][/cs_row][/cs_section][cs_section parallax=”false” style=”margin: 0px;padding: 45px 0px;”][cs_row inner_container=”true” marginless_columns=”false” style=”margin: 0px auto;padding: 0px;”][cs_column fade=”false” fade_animation=”in” fade_animation_offset=”45px” fade_duration=”750″ type=”1/1″ style=”padding: 0px;”][cs_block_grid type=”two-up”][cs_block_grid_item title=”Block Grid Item 1″]wedding-tip-sheet[/cs_block_grid_item][cs_block_grid_item title=”Block Grid Item 2″]About Darlene Tan-Salazar, W@W Supplier of Year (2015): Darlene started out as a Planner/Coordinator of Perfect 10 Weddings. Since she needed more time for family matters, she opted to focus on emceeing, and has since started “The Wedding Tip Sheet“, a Facebook page that tackles the practical points in planning a wedding.[/cs_block_grid_item][/cs_block_grid][/cs_column][/cs_row][/cs_section][/cs_content]

WaW Tip Sheet: The Perfect Wedding

[cs_content][cs_section parallax=”false” style=”margin: 0px;padding: 45px 0px;”][cs_row inner_container=”true” marginless_columns=”false” style=”margin: 0px auto;padding: 0px;”][cs_column fade=”false” fade_animation=”in” fade_animation_offset=”45px” fade_duration=”750″ type=”1/1″ style=”padding: 0px;”][cs_text]They say “the perfect wedding” is a myth.

I dare say, “the perfect wedding is not a myth”. It can happen anytime, anywhere.
But where do you get the perfect set of suppliers? How do you ensure perfect weather?
My response?

Before you can have the perfect set of suppliers or ensure perfect weather, you will need first and foremost, the perfect couple.

How do you become the perfect couple?

Let’s take it from those who have already achieved that status.

a) They are the ones who researched for suppliers before booking. They joined a reputable online community like Weddings at Work to get feedback from fellow couples before making decisions on whom to book.

b) They are at peace with their choices because they know they chose according to how the suppliers match their needs and their personalities — not just the price or the freebies.

c) They dutifully did their part as a couple by filling out templates, being fully present during meetings, and properly labelling all turnovers. They also did RSVP call outs and text blasts (either on their own or through their coordinator) and they worked on their guest list with much focus, despite it being one of the most difficult tasks of a couple prior to marriage.

d) That way… on the day… they can let go and let God. They can smile with immense joy because they know they are in good hands. They can let little things pass without betraying frustration or disappointment on their faces. They are mature enough to know that things can only be as perfect as they want them to be.

e) They can’t control guest attendance, traffic, weather, and even the beauty of the batch of flowers that would be delivered on their day, but they can control their reaction to irritants. They can be contented with what they have and still choose to have fun.

Let’s think of “what if” scenarios.

So it rained, right before your bridal march. Are you going to cry or shrug it off? Wouldn’t it be better to show the guests what a trooper you are and how ready you are for the real world as a wife?

So not all your guests arrived despite having confirmed? Will you start mentally computing how much of your money went to waste right after you entered the hall? Or will you smile, enjoy your guests’ applause, and dance to your heart’s delight with your groom without thinking of the empty seats?

While decline in guest attendance costs money, it will be cost you more if you don’t smile or you betray too much annoyance on your face. Why? Because by frowning all the time, you will end up wasting the otherwise great photos and video clips your teams could have captured on your day.

So your suppliers are late because of an accident on the road that caused a major traffic jam…Will pouting and throwing a tantrum make things move faster? You can always shrug it off and smile. Let your suppliers weave their magic despite limited time. (And i will tell you that if you got reputable ones, they will be able to weave their magic more when you show them how confident you are in their abilities despite the unexpected hitch.)
Bottomline: Choose the members of your team wisely then trust them to fulfil your expectations. Your contentment with what they can deliver and your inner peace that everything will work out for the good can do wonders.

Smile, enjoy, and let your guests see what a perfect wedding you have. Nothing and no one can literally or figuratively rain on your parade if you have that inner joy that only real love and real trust can exude.

Photo courtesy of Manny & April Photography.


Read more of Darlene Tan-Salazar’s Wedding Tip Sheet articles at www.weddingsatwork.com/category/waw-wedding-tip-sheet/.[/cs_text][/cs_column][/cs_row][/cs_section][cs_section parallax=”false” style=”margin: 0px;padding: 45px 0px;”][cs_row inner_container=”true” marginless_columns=”false” style=”margin: 0px auto;padding: 0px;”][cs_column fade=”false” fade_animation=”in” fade_animation_offset=”45px” fade_duration=”750″ type=”1/1″ style=”padding: 0px;”][cs_block_grid type=”two-up”][cs_block_grid_item title=”Block Grid Item 1″]wedding-tip-sheet[/cs_block_grid_item][cs_block_grid_item title=”Block Grid Item 2″]About Darlene Tan-Salazar, W@W Supplier of Year (2015):

Darlene started out as a Planner/Coordinator of Perfect 10 Weddings. Since she needed more time for family matters, she opted to focus on emceeing, and has since started The Wedding Tip Sheet, a Facebook page that tackles the practical points of planning a wedding.[/cs_block_grid_item][/cs_block_grid][/cs_column][/cs_row][/cs_section][/cs_content]

WaW Column Wedding Tip Sheet: How does one start preparing for a wedding?

[cs_content][cs_section parallax=”false” style=”margin: 0px;padding: 45px 0px;”][cs_row inner_container=”true” marginless_columns=”false” style=”margin: 0px auto;padding: 0px;”][cs_column fade=”false” fade_animation=”in” fade_animation_offset=”45px” fade_duration=”750″ type=”1/1″ style=”padding: 0px;”][cs_text]Editor’s Note: This is former Wedding Coordinator extraordinaire, Darlene Tan-Salazar’s very first entry for WaW Wedding Tip Sheet. The Wedding Tip Sheet are practical tips on how to plan, coordinate and organize your wedding efficiently. [/cs_text][/cs_column][/cs_row][/cs_section][cs_section parallax=”false” style=”margin: 0px;padding: 45px 0px;”][cs_row inner_container=”true” marginless_columns=”false” style=”margin: 0px auto;padding: 0px;”][cs_column fade=”false” fade_animation=”in” fade_animation_offset=”45px” fade_duration=”750″ type=”1/1″ style=”padding: 0px;”][cs_text]Did you just get engaged?

After the initial high of the proposal comes the daunting task of planning for the wedding and your life together as husband and wife.

How does one start planning for a wedding?

Below are some suggested steps:

A.Inform your parents of your plan to get married before all other details.

Avoid planning in secret. Have them say their two cents at the beginning. That’s easier than having to deal with changes when you’ve already prepared and booked a lot of suppliers.

Important Note: Join the Weddings at Work community so you can get feedback from real couples regarding your plans and prospective suppliers.

B. Decide on what kind of wedding you want to have — intimate, mid-size, or big; within the metro or out of town; formal or laidback.

Scout for suppliers to have a general idea regarding how much they cost, then plan, and make a realistic budget before even booking anybody.

You don’t need to ask each supplier for a rate sheet, that would be too time consuming on your part.
Check out their websites first and/or ask fellow brides/grooms regarding feedback and fees.

C. Decide on your ceremony venue.

The ceremony reservation gives you a final date and an anchor for reserving your reception venue.

It also gives you a chance to send inquiries to suppliers because you have a final date and a ceremony venue. Yes, you need to include those details — including the reception venue — when you inquire so suppliers can determine availability and give you correct out of town rates, if applicable.

Before booking your ceremony venue, ask about restrictions. That way, you won’t be surprised about additional fees and things you can’t do.

In other words, before parting with your hard earned money, do your research. You won’t be able to get a refund once you’ve given your downpayment to reserve the slot.

D. After you’ve booked your ceremony venue, you can go on a hunt for your reception venue.

Consider proximity to your ceremony area, parking, and your chance to have control over choosing your suppliers. Some reception venues have supplier restrictions and accreditation requirements.

E. Now that you have your venues, you can short list 3-5 suppliers per category, then locate the ones who best match your budget, taste, and personality.

“No commitment meetings” need not be done personally. One can also opt for online meetings to gauge how prospective suppliers deal with possible clients.

Focus first on those who can’t do more than one wedding a day.

Remember to research before booking, but take isolated negative feedback with a grain of salt.

Important note: A lot of well meaning friends and relatives will be as excited and will volunteer their services or the services of friends. Remember that more often than not, it’s still better to book your own suppliers and avoid relying on friendship or blood ties. Things can get problematic and you don’t want to feel awkward dealing with these friends and relatives in other parties or gatherings after your wedding.

I think I’ve said a mouthful already and I may have caused you to feel overwhelmed. (I hope not…)

Tip: Simplify. Do things step by step to avoid feeling like you’re drowning in details. Start with the ones you really need then add the fancy details later.

And when you’re feeling too daunted, you can always rely on the sharing and words of wisdom of your w@w brothers and sisters, as well as the responses and recommendations of the suppliers you’ve booked.


Read more of Darlene Tan-Salazar’s Wedding Tip Sheet articles at www.weddingsatwork.com/category/waw-wedding-tip-sheet/.[/cs_text][/cs_column][/cs_row][/cs_section][cs_section parallax=”false” style=”margin: 0px;padding: 45px 0px;”][cs_row inner_container=”true” marginless_columns=”false” style=”margin: 0px auto;padding: 0px;”][cs_column fade=”false” fade_animation=”in” fade_animation_offset=”45px” fade_duration=”750″ type=”1/1″ style=”padding: 0px;”][cs_block_grid type=”two-up”][cs_block_grid_item title=”Block Grid Item 1″]darlene-tan[/cs_block_grid_item][cs_block_grid_item title=”Block Grid Item 2″]About Darlene Tan-Salazar, W@W Supplier of Year (2015): Darlene started out as a Planner/Coordinator of Perfect 10 Weddings. Since she needed more time for family matters, she opted to focus on emceeing, and has since started “The Wedding Tip Sheet“, a Facebook page that tackles the practical points of planning a wedding.[/cs_block_grid_item][/cs_block_grid][/cs_column][/cs_row][/cs_section][/cs_content]

5 Things to Remember When Getting Married during Rainy Season

[cs_content][cs_section parallax=”false” style=”margin: 0px;padding: 45px 0px;”][cs_row inner_container=”true” marginless_columns=”false” style=”margin: 0px auto;padding: 0px;”][cs_column fade=”false” fade_animation=”in” fade_animation_offset=”45px” fade_duration=”750″ type=”1/1″ style=”padding: 0px;”][cs_text]Most brides cringe at the thought of a downpour on their wedding days, especially when they want to hold their ceremonies or their receptions outdoors.

Just imagine mud on your shoes and the trains of your dress, or having all your guests in their suits and cocktail dresses trying to fit under a small roof to avoid getting soaked; Rain can easily turn your special day into a disaster.

It be all that bad. Rain, after all, can be a glorious addition on the day you exchange your I do’s.
We weighed in with some of our W@Wies and got some really great tips on how not to let the rain ruin your wedding day:

1. Get efficient and trustworthy suppliers

Many of the W@Wies raved about how their organizers and suppliers saved their wedding for them and how they didn’t let the bride stress out.

W@Wie Sarah Ingles’ garden-themed wedding was almost relocated indoors, and credits her suppliers for their efficiency.

She shares, “…even if I was quite stressed with the weather pinaubaya ko na lahat sa suppliers ko (I entrusted everything to my suppliers) and they all performed marvellously.”

“Happened to us at Antonio’s,” Nina Comsti said. “Buti na lang may indoor venue and napakagaling ng coordinator mag-troubleshoot!” (It’s a good thing there was an indoor venue and the coordinator was good in troubleshooting)

There are many low-cost organizers and suppliers out there, but it’s in times like the rainy season that you’ll understand why the ones who will cost you a little bit more is worth your investment.

They think on their feet and will make sure everything’s covered even before your notice that anything had gone wrong.

2. Have a Plan B

The most practical thing to do when you schedule your wedding outdoors during rainy season is to have a contingency plan.

Make sure that you have tents and umbrellas ready, and brainstorm with your coordinator on what to do in case the original plan needs to get thrown out the window.

You can even talk to your photographer about using the rain as your backdrop for your wedding photos!

Photographer Noel Salazar advice for would-be brides to just go with whatever happens and adds, “Also, make sure na if rainy season then outdoor wedding, the couple MUST prepare tents. I shot a wedding on the beach while it was raining. Everybody got wet, except for those who had umbrellas.”

Wedding coordinator Ayie Tuates says that she always pushes until there’s no choice but to relocate. She coordinates with the caterer and stylist on how much time they need to spare for the setup and adjusts accordingly.

This is so the setup team will not have too much trouble transferring everything to another venue if it begins to rain.

3. Plan alternative routes going to the venue

Puy Talde reminds suppliers to coordinate a travel plan. “Rains = baha (flood) = traffic,” he says. “If I can’t send an advance party, I tell the driver to stay close to the bridal car even if the route that the bridal car takes doesn’t make sense. At least you arrive in church with the bride.”

You should also make sure that your guests are provided a copy of an alternative route to your wedding venue especially if you’re getting married out of town. This way you can be sure that they are going the best routes possible to make it to your wedding on time.

4. Hire the best entertainers

Since you’re all going to stay indoors for a while, make sure that you have good entertainment lined up.

W@Wie Charo shares about her cousin’s wedding in Phuket last year. She says that the light rain during the ceremony made the wedding look more romantic. They had to transfer to the villa for the reception as the rain started getting stronger, and the cultural performers and the fire dancers entertained the guests while they waited for the tables to be set up. “Galing ng coordinator!” She gushes. “Naging maayos pa rin lahat.” (Everything still turned out well)

5. Keep your sense of humor

One of the things that brides need to remember is to have a sense of humor. You don’t need to crack jokes to entertain your guests, but try to see the best in every situation.

W@Wie Cris Zanrie Cruz attended a wedding when a rumbling of thunder happened while the bride was saying her vows. “It was remarkable! Instead of being sad about the weather, nag-joke yung bride nung kumulog nung vow niya.” (The bride made a joke about the thunder)

Letting the rains affect you may ruin your day completely. Just keep calm and work with your suppliers.

One of our N@Wies who was once a W@Wie, Naj Fernandine, talks about her experience with a storm during a wedding held in Rosemont. She ended up wet along with the coordinators and the photographer’s lens was starting to moisten, but she said that the venue was packed with guests and the event was successful.

“Minsan talaga when the worst comes kayo na lang magkakatrabaho na supplier ang magkakasamang mag-work yun kasal,” she says. “Team work ika nga!” (There will be times when the suppliers are the ones left to make the wedding work. It’s called Team Work.”
“Had a bride before, stressed na stressed kasi it was raining and she wouldn’t be getting her garden wedding, so it was hard to shoot her,” says Noel Salazar.

Focus on the person you will marry, not the weather.

The reality is that sometimes no amount of preparation and planning can make everything alright. At the rate the climate changes are going, rains are bound to happen even in months you are not expecting them to happen.

You should not let it dampen your spirit nor should you let it dictate your day. Don’t spend your days worrying about it, learn how to take it all in stride. Things are better when you don’t stress and you don’t stress everyone around you about it. Just make sure you’ve got a great team behind your wedding and trust them to handle the curves.

As Noel Salazar reminds the brides-to-be, the most important thing in your wedding is the person you’re getting married to and that should be enough to make you smile.
[/cs_text][/cs_column][/cs_row][/cs_section][cs_section parallax=”false” style=”margin: 0px;padding: 45px 0px;”][cs_row inner_container=”true” marginless_columns=”false” style=”margin: 0px auto;padding: 0px;”][cs_column fade=”false” fade_animation=”in” fade_animation_offset=”45px” fade_duration=”750″ type=”1/1″ style=”padding: 0px;”][cs_text]
About the contributor, May De Jesus-Palacpac:
May jests that writing for W@W makes up for the details she missed at her own wedding. Prior to jumping into writing and editing full time, she was a full time musician who spent her last two years in the circuit serenading newlyweds and their guests. May is the Editor of the books Productive Pinoy and Right Start. She is also a blogger and a contributor for other websites and publications.

[/cs_text][/cs_column][/cs_row][/cs_section][/cs_content]

Aisle Do: Table Numbers

In this column, Ernest Pascual of Bespoke Manila talks about how to DIY your table numbers. With the help of Adrian Ardiente for photos, Ernest shows you how to add these personalized touches for your wedding.

Make your table numbers interesting so as to complement your tablescape.

Here’s what you need:
• Papier mâché numbers
• Abaca string
• Faux flowers
• Glue gun
• Glue stick
• A pair of scissors

WaW Aisle Do Table Numbers Materials

Here’s how to do it.
Step 1: Tie a knot to secure one end of the abaca string on the papier mâché number

WaW Aisle Do Table Numbers 07-01
Step 2: Wrap the string in around the number, making sure that the papier mâché is still seen.

WaW Aisle Do Table Numbers 07-02
Step 3: Tie a knot at the end of the string.

WaW Aisle Do Table Numbers 07-03
Step 4: Decorate the table number with faux flowers. Stick these flowers using the glue gun.

WaW Aisle Do Table Numbers 07-04

The end result:

WaW Aisle Do Table Numbers 07-05

Bespoke Tip: For your table numbers, choose a color that is different from that of the centerpiece. These numbers must be visible from a distance.


Read more of Ernest Pascual’s Aisle Do articles at weddingsatwork.com/category/aisle-do/.

Aisle Do: Twig Napkin Ring

In this column, Ernest Pascual of Bespoke Manila talks about how to DIY your twig napkin ring. With the help of Adrian Ardiente for photos, Ernest shows you how to add these personalized touches for your wedding.

Our aim is to give you and other soon-to-wed couples ideas on how you can personalize your wedding by doing simple do-it-yourself (DIY) projects. We also want to help you create some lovely details to make your wedding extra special. We will tell you what materials to source, the step-by-step procedure, and how the details we have designed look during an actual wedding.

Twig Napkin Ring

The dried twigs, hints of lilac, and silver touches on the twig napkin ring will make a pretty addition to your table setting.

Here’s what you need:
• Twigs
• Wire
• Faux flowers
• Beads
• Glue gun
• Glue stick
• A pliers of pliers

WaW Aisle Do Twig Napkin Rings Materials

Here’s how to do it.
Step 1: Form a small wreath using the twigs.

WaW Aisle Do Twig Napkin Rings 06-01 A
Step 2: Secure the trimmings and wreath with the wire.

WaW Aisle Do Twig Napkin Rings 06-01 B
Step 3: Add beads on the wreath using the glue gun.

WaW Aisle Do Twig Napkin Rings 06-03

The end result:

WaW Aisle Do Twig Napkin Rings 06-04

Bespoke Tip: Since caterers/hotels fold napkins differently, endorse these napkin rings to your coordinator, caterer, or hotel account executive ahead of time so he or she can suggest a napkin fold to match the napkin ring.


Read more of Ernest Pascual’s Aisle Do articles at weddingsatwork.com/category/aisle-do/.

Aisle Do: Doily Cones

In this column, Ernest Pascual of Bespoke Manila talks about how to DIY your doily cones. With the help of Adrian Ardiente for photos, Ernest shows you how to add these personalized touches for your wedding.

Our aim is to give you and other soon-to-wed couples ideas on how you can personalize your wedding by doing simple do-it-yourself (DIY) projects. We also want to help you create some lovely details to make your wedding extra special. We will tell you what materials to source, the step-by-step procedure, and how the details we have designed look during an actual wedding.

Doily Cones

Send off the newlyweds with a shower of flower petals using these dainty easy-to-do cones.

Here’s what you need:
• Craft paper
• Doily
• Glue gun
• Glue stick
• Printed sticker
• A pair of scissors
• Cutting mat
• Cutter
• Ruler

WaW Aisle Do Doily Cone Materials

Here’s how to do it.
Step 1: Cut the craft paper into a square.

WaW Aisle Do Doily Cone 05-01
Step 2: Line one side of the craft paper with double-sided tape until about half-an-inch to the corner edge.

WaW Aisle Do Doily Cone 05-02
Step 3: Create a cone using the craft paper by rolling it from the corner edge where the double-sided tape ends.

WaW Aisle Do Doily Cone 05-03 A

WaW Aisle Do Doily Cone 05-03 B
Step 4: Cut the doily into quarters.

WaW Aisle Do Doily Cone 05-04
Step 5: Wrap the cut doily around the bottom of the cone and secure it using the glue gun.

WaW Aisle Do Doily Cone 05-05
Step 6: Place a ready-made sticker at the tip of the cone and put flower petals inside the cone.

WaW Aisle Do Doily Cone 05-06

Photo Credit: Metrophoto

The end result:

WaW Aisle Do Doily Cone

Bespoke Tip: For this project, you may choose to use wrapping paper depending on your wedding theme.


Read more of Ernest Pascual’s Aisle Do articles at weddingsatwork.com/category/aisle-do/.

Aisle Do: DIY Your Candle Holders

In this column, Ernest Pascual of Bespoke Manila talks about how to DIY your candle holders. With the help of Adrian Ardiente for photos, Ernest shows you how to add these personalized touches for your wedding.

Our aim is to give you and other soon-to-wed couples ideas on how you can personalize your wedding by doing simple do-it-yourself (DIY) projects. We also want to help you create some lovely details to make your wedding extra special. We will tell you what materials to source, the step-by-step procedure, and how the details we have designed look during an actual wedding.

Candle Holders

Candles exude a warm glow. Create further interest and a dramatic touch on the table by crafting these easy-to-do candle holders.

Here’s what you need:
• Jewel stickers
• Glass container
• Printed parchment paper
• Double-sided tape
• A pair of scissors
• Craft paper
• Pencil

WaW Aisle Do Candle HoldersMaterials

Here’s how to do it.
Step 1: Create a pattern for the glass container using the craft paper.

WaW Aisle Do Candle Holders04-01
Step 2: Trace the pattern paper on the parchment paper and cut it.

WaW Aisle Do Candle Holders04-02 A

WaW Aisle Do Candle Holders04-02 B
Step 3: Place double-sided tape on the traced pattern paper and wrap the traced pattern paper around the glass container.

WaW Aisle Do Candle Holders04-03 A

WaW Aisle Do Candle Holders04-03 B
Step 4: Decorate it with jewel stickers.

WaW Aisle Do Candle Holders04-04

WaW Aisle Do Candle Holders04-05

The end result:

Photo Credit: Metrophoto

Photo Credit: Metrophoto

Bespoke Tip: You need to create a pattern since wrapping the glass container can be a challenge.


Read more of Ernest Pascual’s Aisle Do articles at weddingsatwork.com/category/aisle-do/.

Aisle Do: DIY Your “Just Married” Sign

In this column, Ernest Pascual of Bespoke Manila talks about how to DIY your “Just Married” sign. With the help of Adrian Ardiente for photos, Ernest shows you how to add these personalized touches for your wedding.

Our aim is to give you and other soon-to-wed couples ideas on how you can personalize your wedding by doing simple do-it-yourself (DIY) projects. We also want to help you create some lovely details to make your wedding extra special. We will tell you what materials to source, the step-by-step procedure, and how the details we have designed look during an actual wedding.

The “Just Married” Sign

With some buttons, scrap lace, and acrylic jewels, create this lovely signage worthy of a couple’s portrait after the ceremony.

Here’s what you need:
• Printed “Just Married” sign
• Buttons
• Jewel stickers
• Lace
• Glue gun
• Glue stick
• A pair of scissors
• Cutter
• Cutting mat
• A pair of pliers
• Ruler
• Double-sided tape
• Illustration board
• Ribbon

WaW Aisle Do Ernest Pascual Materials

Here’s how to do it.

Step 1: Attach the printed “Just Married” sign onto the illustration board using the double-sided tape.

WaW Aisle Do Ernest Pascual 03-01
Step 2: Cut the excess illustration board using the cutter, ruler, and cutting board.

WaW Aisle Do Ernest Pascual 03-02
Step 3: If the buttons you are using have hooks, remove them using the pair of pliers.

WaW Aisle Do Ernest Pascual 03-03
Step 4: Glue the lace onto the front and back of the “Just Married” sign to serve as handles.

WaW Aisle Do Ernest Pascual 03-04
Step 5: Decorate the sign with assorted buttons.

WaW Aisle Do Ernest Pascual 03-05 A

WaW Aisle Do Ernest Pascual 03-05 B

WaW Aisle Do Ernest Pascual 03-05 C

WaW Aisle Do Ernest Pascual 03-05 D

The end result:

Photo Credit: Metrophoto

Photo Credit: Metrophoto

Bespoke Tip: Try to be consistent with all the details you create for your wedding. Using the same font, graphics and color scheme will help you achieve a more harmonious and visually appealing wedding reception spectacle.


Read more of Ernest Pascual’s Aisle Do articles at weddingsatwork.com/category/aisle-do/.

Aisle Do: DIY Your Escort Cards/Seating Cards and Place Cards

Another W@W Columnist debuts today. Ernest Pascual is aptly dubbed by W@Wie Luzel as Details Diva. He has this knack of making little details to complete the look. His expertise on materials and OC-ness is also a great plus. He wil be our resident DIY guru here with the help of Adrian Ardiente, who will be in charge of shooting the how-to’s. Let’s all learn with them.

Our aim is to give you and other soon-to-wed couples ideas on how you can personalize your wedding by doing simple do-it-yourself (DIY) projects. We also want to help you create some lovely details to make your wedding extra special. We will tell you what materials to source, the step-by-step procedure, and how the details we have designed look during an actual wedding.

Escort Cards/Seating Cards

A guest list is important in any social function and a wedding is not an exception. If you are having assigned tables at your reception, then you need escort cards, also known as seating cards. These cards will direct guests to their assigned tables. Usually, the names of the guests with their assigned tables are printed or handwritten. Then, all of these cards are arranged alphabetically by family name.

Before, simply an alphabetical list of the wedding guests and the seating arrangement (or the seat plan) were placed on the registration table. Through the years, this regular list has evolved into custom-made or printed cards. For this particular project, the escort card is attached to the packaging of the souvenir items which are handmade candles.

Here’s what you need:
• Jute bag
• Jute string
• Printed escort cards and sticker
• Souvenir item
• Faux flowers
• Corded lace
• Glue gun
• Glue stick
• Tissue
• Jewel stickers
• Puncher
• A pair of scissors

WaW Aisle Do Escort Cards Materials

Here’s how to do it.
Step 1: Stick the label onto the souvenir item to personalize it.

WaW Aisle Do Escort Cards1
Step 2: Wrap tissue around the souvenir item for protective layering.

WaW Aisle Do Escort Cards2
Step 3: Insert the souvenir item into the jute bag. Tie a string around the bag. Set it aside.

WaW Aisle Do Escort Cards3
Step 4: Have escort cards printed. Punch a hole on them and embellish them with jewel stickers.

WaW Aisle Do Escort Cards5
Step 5: Tie a corded lace around the bag.

WaW Aisle Do Escort Cards4
Step 6: Slide in the escort card and secure it with a knot using the jute string.

WaW Aisle Do Escort Cards6

WaW Aisle Do Escort Cards7

WaW Aisle Do Escort Cards8

WaW Aisle Do Escort Cards9

Step 7: Attach a faux flower to conceal the jute knot.

WaW Aisle Do Escort Cards10


WaW Aisle Do Escort Cards11

WaW Aisle Do Escort Cards12

The end result? These were used for the wedding of Miguel and Laverne. Beautiful, right?

WaW Aisle Do Escort Cards14

Photo Credit: Metrophoto

WaW Aisle Do Escort Cards13

Photo Credit: Metrophoto

Bespoke Tip: If you are having an outdoor reception, these escort cards must be securely fastened to something to avoid being blown away by the wind.

Place Cards

Place cards are commonly used on the presidential or V.I.P. tables. They indicate the place where a specific guest will be seated on the table. Create a conversation piece that your guests will want to take home after the party.

Here’s what you need:
• Jute cloth
• Roll of jute string
• Printed place cards
• Jewel stickers
• Silver buttons
• Glue gun
• Glue stick
• A pair of pliers

Materials

WaW Aisle Do Place Cards Materials

Here’s how to do it.
Step 1: Cut the jute cloth to size.

WaW Aisle Do Place Cards1
Step 2: Create fringes by pulling 2-3 strands from the four edges of the cloth.

WaW Aisle Do Place Cards2
Step 3: Attach the place card onto the jute cloth using the glue gun.

WaW Aisle Do Place Cards4

WaW Aisle Do Place Cards3

Step 4: Place jewels and buttons to secure the place card onto the jute cloth.

WaW Aisle Do Place Cards5

These gorgeous place cards were used for the wedding of Miguel and Laverne.

WaW Aisle Do Place Cards6

Photo Credit: Metrophoto


Bespoke Tip: Think of escort cards that will complement your theme. For this rustic luxe theme, place cards are attached on a roll of jute string.


Read more of Ernest Pascual’s Aisle Do articles at weddingsatwork.com/category/aisle-do/.